Manage Users
Manage, deactivate, and edit users through the Control Panel. View username, display name, email address, user type, last login, created date, and user activity.
There is a 1,000 display limit for the number of users that can be shown when you load the user management tool. Add filters and leverage search to reduce the users to display, especially when displaying community members.
- Navigate to Site tools > Control panel > Users & Groups > Users.

- Manage your user list including adding users, deactivating users, adding users to groups and changing the user's user type. Narrow the displayed users by using the table filters:
- Search for users. The search box allows you to search the username, Display Name, and Email to filter the user. If you are searching for a domain in the email like @example.com make sure you include @ in your search request. If you just put example.com it will not find the email domain.
- Group. Only see users belonging to the group selected from the drop-down menu.
- User Type. By default, the user type is set to Pro Member. Filter by selecting a role from the drop-down menu or changing the user type to Community Member.
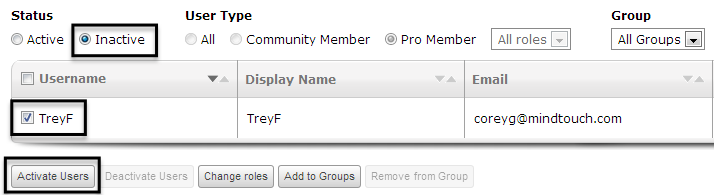
- Status. By default, the status is set to Active, which shows only active users. Selecting the Inactive radio button, you'll see all of the users that you've deactivated.
Delete users
Users cannot be deleted to avoid accidentally deleting scripted content those users may have created. Deactivate users to safely disable their access.
Deactivate users
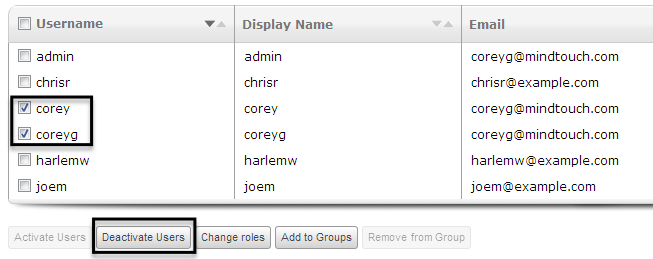
To deactivate users, select a user or multiple users in the list and click Deactivate Users (button is only available when active users are selected).
Deactivated users automatically become community members for security. Community members, while they can view content on your site, cannot make any changes to content and preserve limited Pro Member seats.
Activate users
For security, a user account with multiple failed login attempts is set to inactive. Group associations remain connected but inactive.
- Filter by the Inactive status, select the users you want to activate and click Activate.
- If the user was formerly a Pro Member, the account was automatically switched to Community Member when made inactive. Switch them back to Pro Member status if needed.
Edit users
- To edit a user, click the Edit icon at the end of a user row.
- Modify details as needed:
- Username. The name users use to login to the site. If you have single sign-on (SSO) set up, then this is the username from the identity provider (IdP).
- Display Name. The display name shown in the MindTouch interface when a user leaves a comment, edits a page or is logged in. If no display name is entered, the username is displayed.
- Email. The email to which notifications are sent from the system.
- Password. The password MUST be a minimum of 8 characters in length and must contain at least 2 of the following characters: lowercase, uppercase, digits or symbols.
- Seat Management. The seat management indicates whether the user is a community member (viewer) or pro member (contributor). Pro members are assigned roles to specify the editorial privileges on the site.
- Status. Deactivate or activate a user.
- Authentication. By default, the authentication is set to Local, unless you have LDAP/AD integration.
- Add to Groups. Add or remove users from groups by checking/unchecking the groups in the list.
- Click Save.